THE AUROR PROJECT – CHALLENGE 1 [SETTING THE LAB UP AUTOMATICALLY]

This blog post was written by Amarjit Labhuram
Introduction
In The Auror Project launched a course called the 3 machines lab – Active Directory series and if you know me by know you know I am always happy to jump on when it comes to Active Directory. The course is formatted as a challenge based learning process with the objective of cementing the fundamentals of Active Directory over 9 sessions (Be sure to look out for more blogs on the next couple of challenges).
The first session was held on 16/04/2022 and the challenge presented for that session was to automate building of an Active Directory lab that would:
- Set up a Windows Server Virtual Machine
- Install Active Directory Domain Services on the Windows Server
- Set up a Windows 10 Virtual Machine
- Add the Windows 10 Virtual Machine as a domain joined machine from step 2 as well as install specific software and configurations.
We were provided with various automation options to achieve this objective and I ended up looking into Packer and Vagrant. One of the reasons I looked at Packer is because it allows you to provision machines from ISOs and since I had been building labs for some time, albeit manually, this was an opportunity to utilize these local copies of ISOs I had lying around. Vagrant easily deploys the provisioned images with all the extra final configurations you would want your Virtual Machines to have when ready. I have always been inclined to use Virtualbox as my hypervisor of choice so all the steps shown will be focused on building the lab in Virtualbox, needless to say the configuration files are easily modified to use various hypervisors that you may want to deploy the lab on to.
The first step is to use Packer to build a Windows Server 2019 and Windows 10 base image. Then, a lab environment is created by Vagrant using the image output from Packer.
The lab consists of:
- Domain Controller – dc01.auror.local
- Workstation – pc01.auror.local
To follow along I recommend that you clone this repo that contains all the necessary configuration files needed to launch the lab. (Please note that this lab requires you to aleady have the ISO files downloaded and are not contained within the repo).
Provisioning base images with Packer
The first step is to build base images that will be used to launch the Virtual Machines that Vagrant will configure. To do this you will need the ISO images you want to use saved in the Packer folder of the respective Operating System as well as install Packer. Packer uses json to load the configurations you want to use and would look something like this:
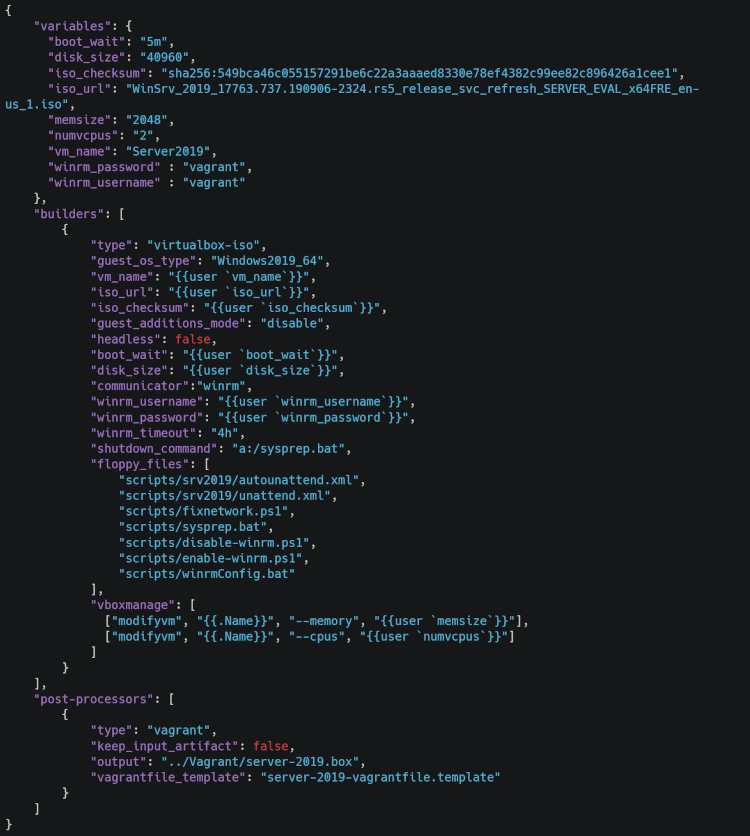
The above json data is taken from the server-2019 folder that tells Packer to create a Virtualbox VM with the appropriate disk size, memory allocation, the ISO to be used and configures winrm with a respective user and password that will be used to run the installation scripts using the Virtualbox builder and finally prepares the image to be used by Vagrant at post-processing. We will also need a template file that will prepare the post-processed image and that should look something like this:
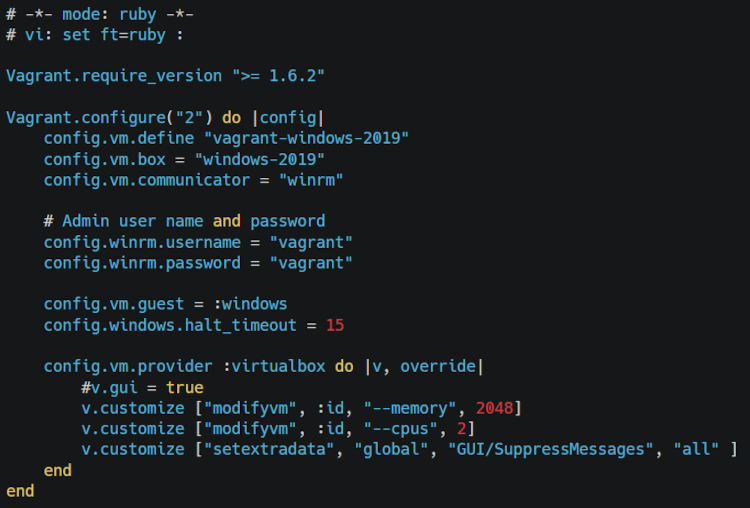
Additionally we will need to create a scripts folder in the directory where the Packer files are that will store any script we want to use to provision the Virtual Machines. This is where we need to save the unattened.xml and autounattend.xml files that have the details of provisioning the machines and which script to run when. With everything in place, launch Powershell as an Administrator and then we can execute the following command to provision the machines:
packer ./server-2019.json
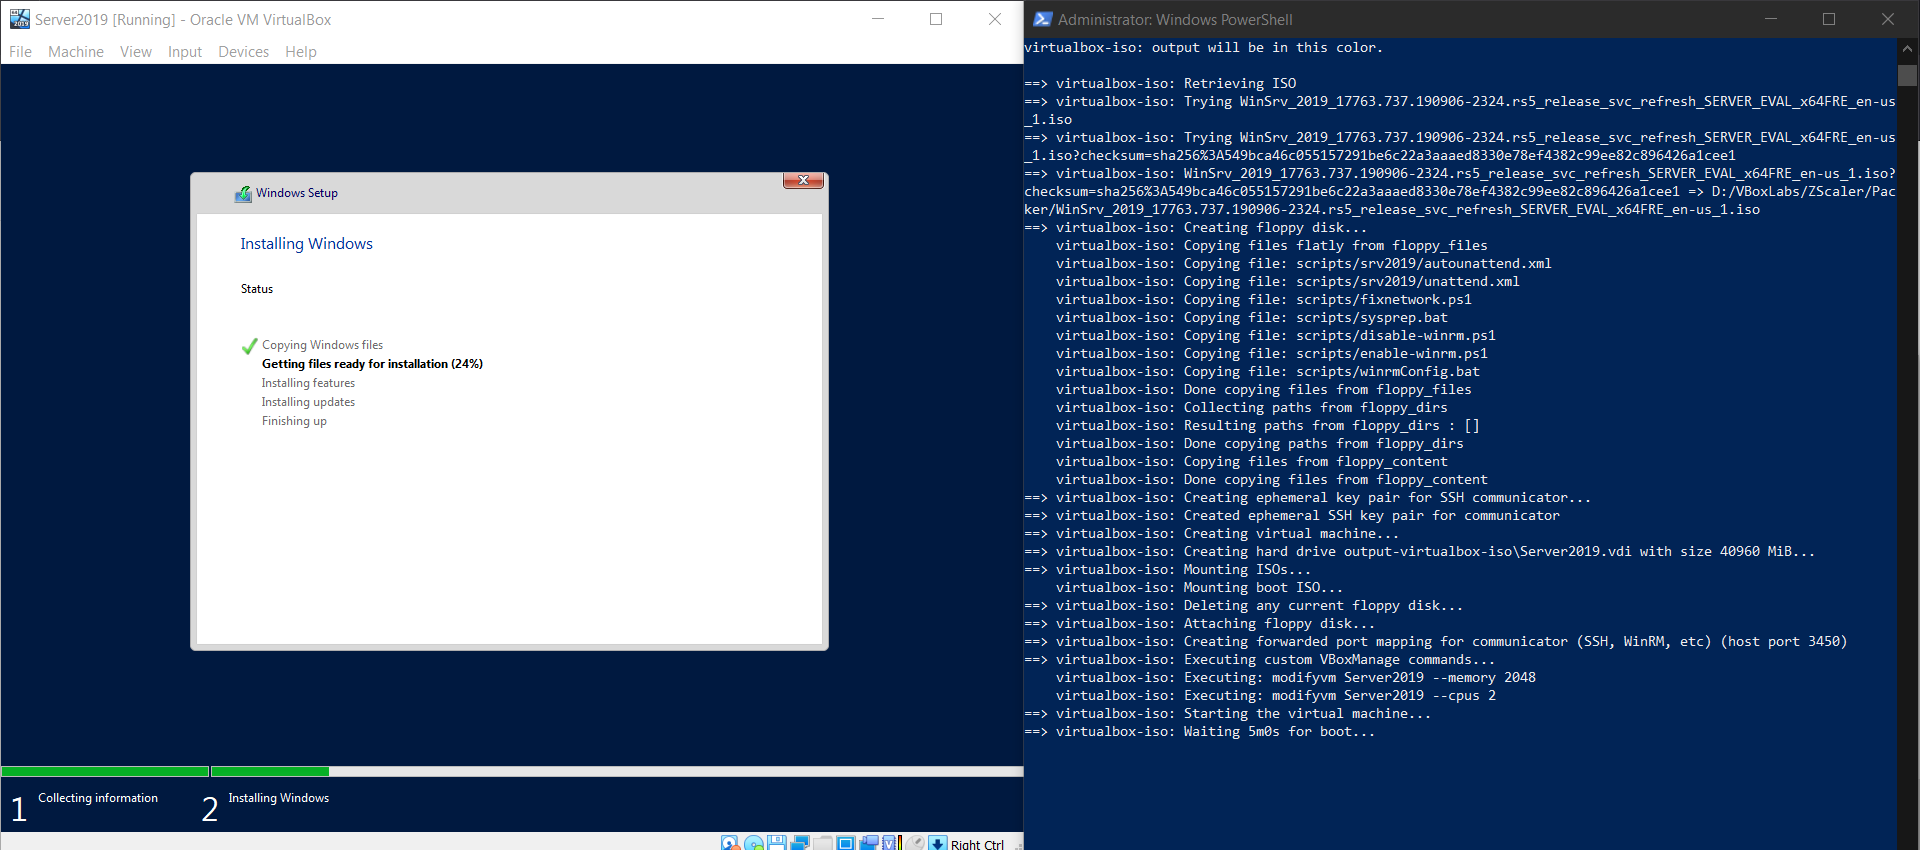
As seen in the image above Packer starts provisioning a Windows Server 2019 Virtual Machine that we can later use with Vagrant. The full Packer configuration is available here. Similarly the process is the same for provisioning the Windows 10 Virtual machine and the configuration files for that are available here. The image below shows the launching of the Virtual Machine after running
packer ./win10.json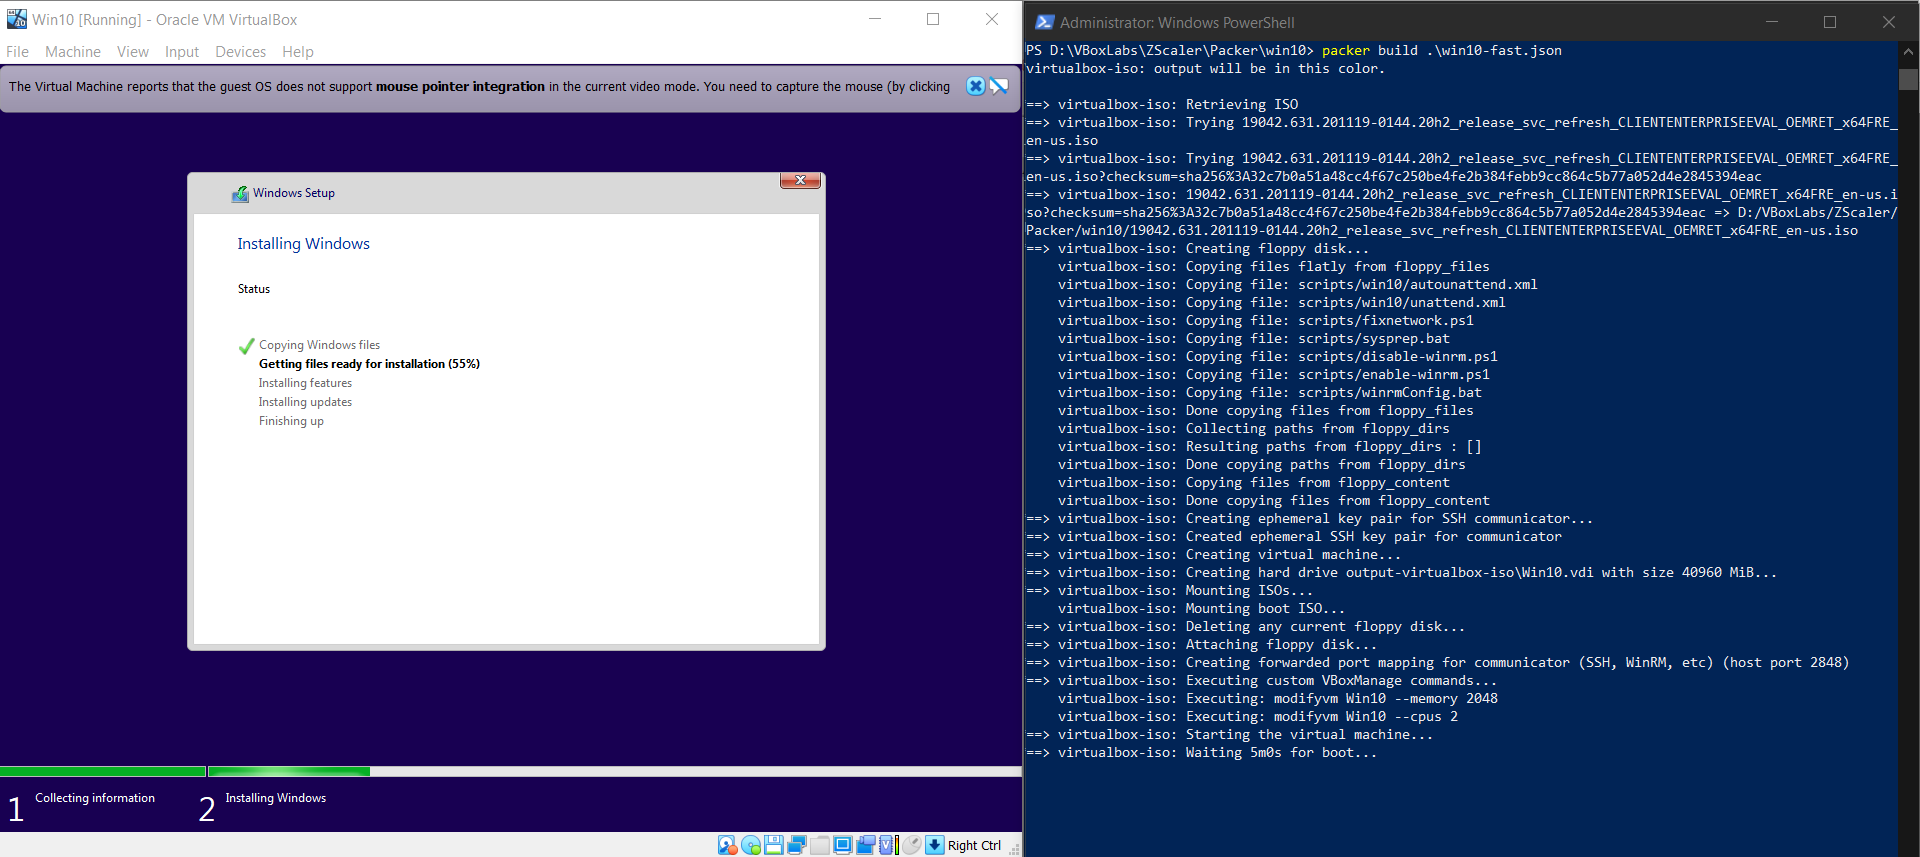
Provisioning Virtual Machines with Vagrant
The next step is to download and install Vagrant. Make sure you install the reload and vbguest plugins before running vagrant as they will be needed when provisioning the Virtual Machines.
vagrant plugin install vagrant-reloadvagrant plugin install vagrant-vbguestOnce Vagrant is all setup, we can copy the .box files into the Vagrant folder of the cloned repo, where they will be used to launch with the final configurations that we want on them. This folder contains a file called Vagrantfile that stores the information of the machines to be launched and the scripts that need to be ran to provision them that looks something like this:
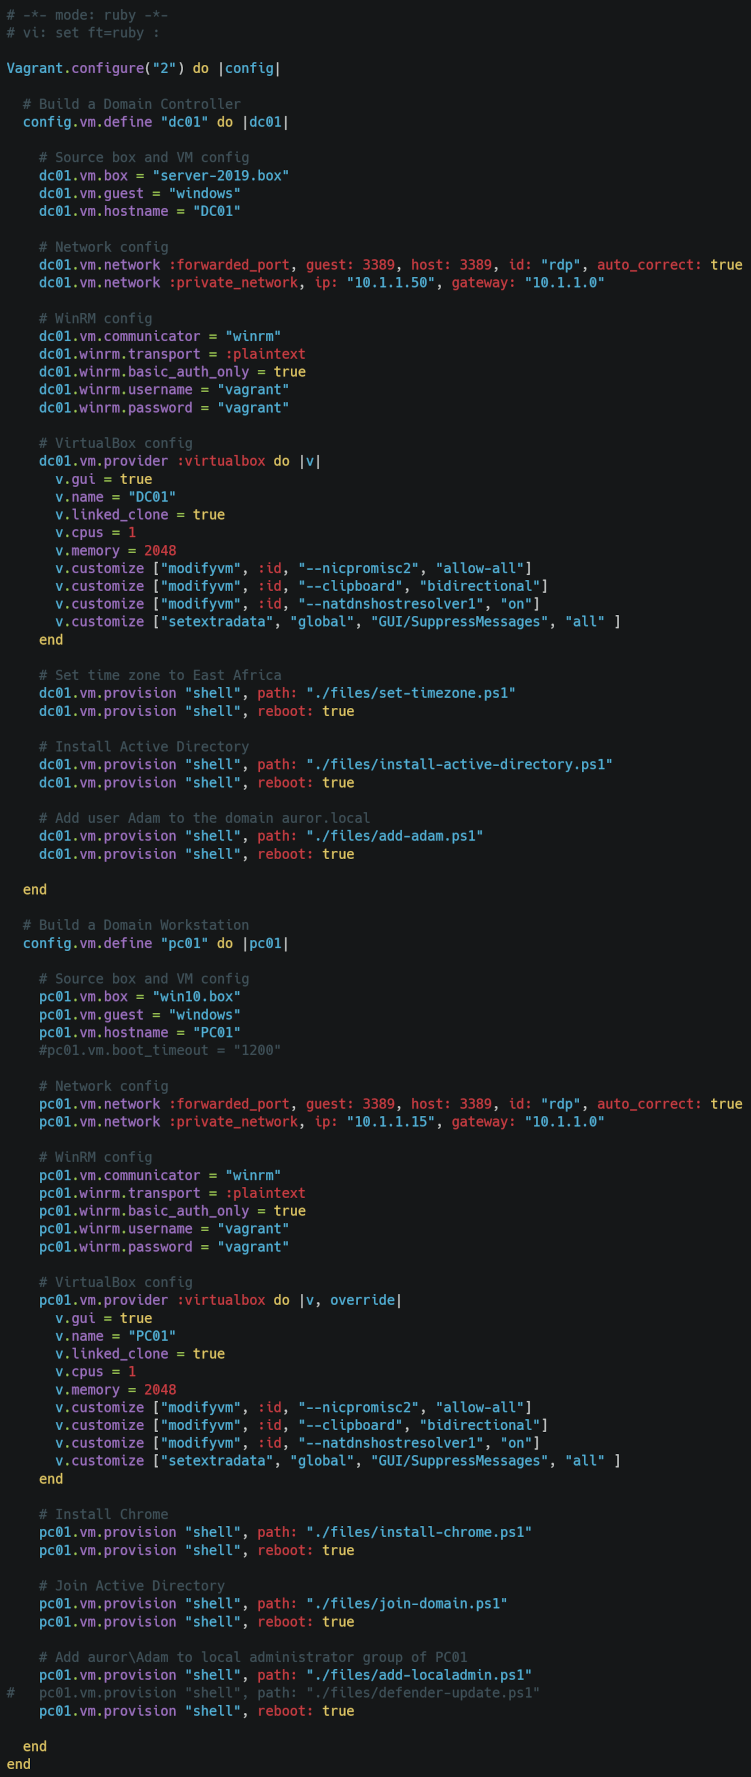
The scripts used during this phase of the lab installation are located in a folder called files. This contains the scripts that will install the ADDS services on the Windows Server, promote it to a Domain Controller and add the user Adam to the domain. Additionally there are scripts that will run on the Windows 10 Virtual Machine that will install Google Chrome, join the machine to the domain and add the user Adam that was created on the domain as a local administrator on the box. With everything in place we can run:
vagrant up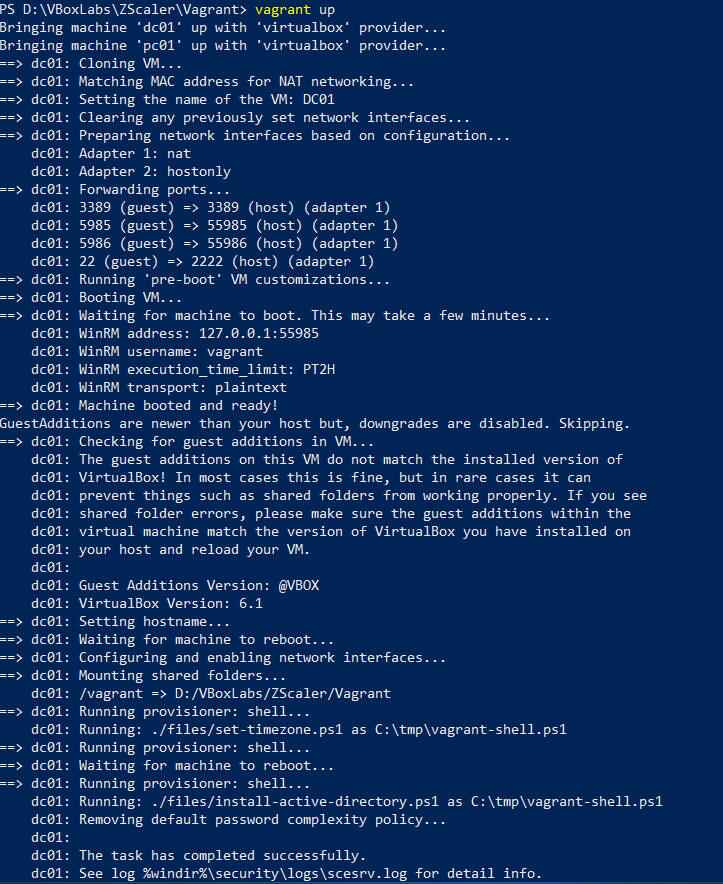
If everything runs without breaking or erroring out we should have the lab up and running and our Virtualbox Manager will show the two base packer boxes as well as DC01 and PC01.

We can verify if we achieved the objective of the challenges by checking the test cases:
- RDP into PC01 with user Adam should be successful
- From PC01 as user Adam, running the command
net user \\auror.localshould result in command completed successfully.
- Run PowerView function
Get-DomainUseron PC01 to show Adam as a user
- Chrome should be installed on PC01

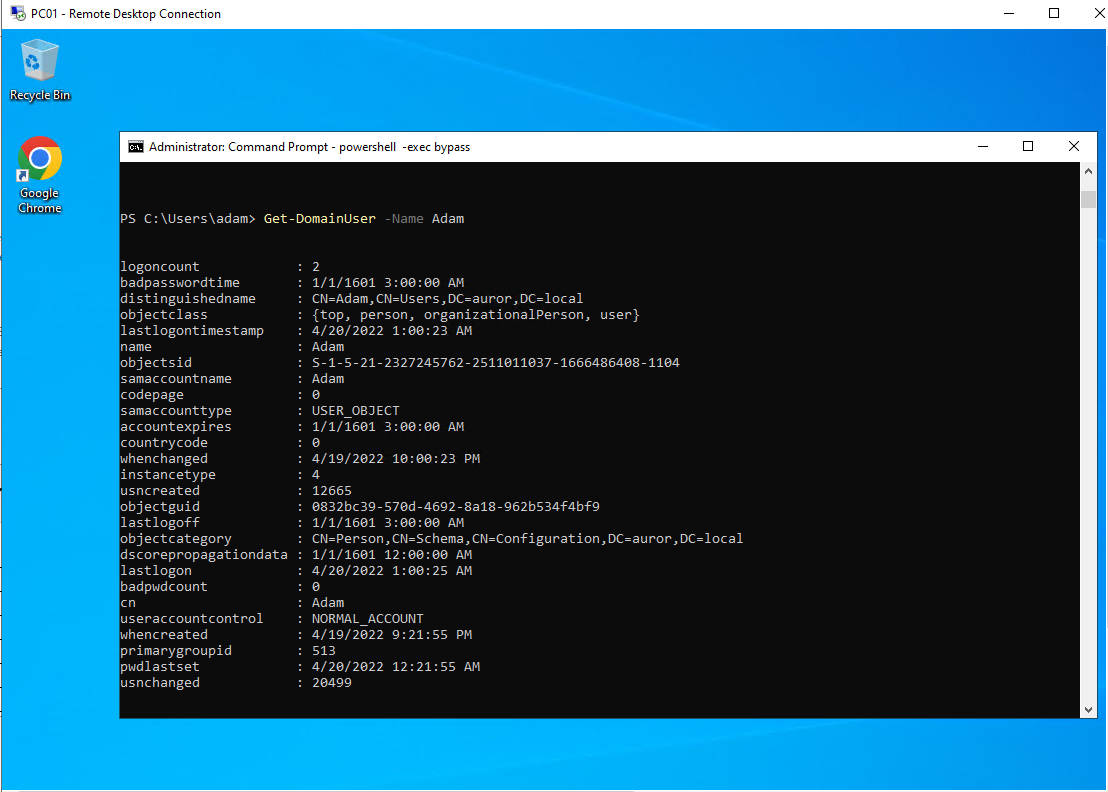

That concludes the first challenge of the 3 machines lab sessions. There could be better ways of achieving the objective but this is the route I took. It was very fulfilling having completed automation of the labs and I am looking forward to the next set of challenges in store. A huge round of appluase goes out to Sudarshan Pisupati for kicking off this series.
Happy Hacking to all!
References
https://github.com/chr0n1k/Auror-Project
https://detectionlab.network/introduction/packerandvagrant
https://github.com/eaksel?tab=repositories
Disclaimer
The MacroSec blogs are solely for informational and educational purposes. Any actions and or activities related to the material contained within this website are solely your responsibility. The misuse of the information on this website can result in criminal charges brought against the persons in question. The authors and MacroSec will not be held responsible in the event any criminal charges be brought against any individuals misusing the information in this website to break the law.
